## Role 신규 추가항목 필요
AWS에 Kubernetes 설치
www.youtube.com/watch?v=aZd0UolVwD4&t=12s


EKS 설정 선제조건
- AWS Admin 권한 계정
- AWS CLI 접근 권한
- 인스턴스 (EKS 클러스터 관리를 위함)

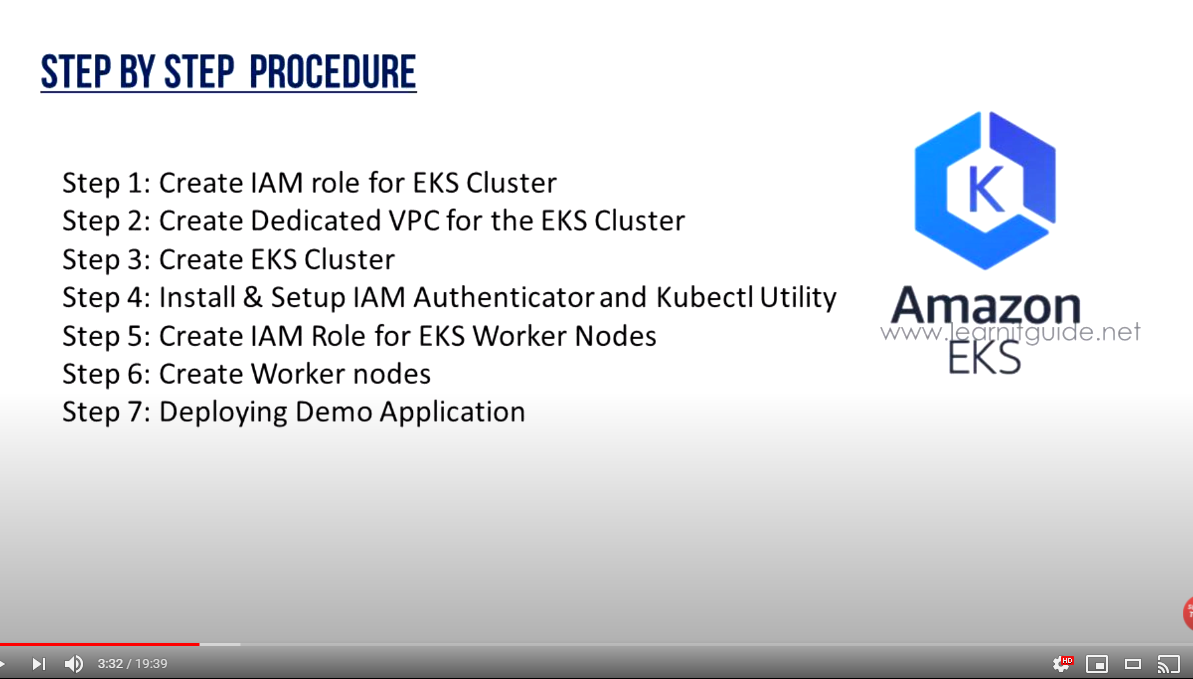
EKS 설치를 위한 단계별 절차
1. Create IAM role for EKS Cluster
2. Create Dedicated VPC for the EKS Cluster
3. Create EKS Cluster
4. Install & Setup IAM Authenticator and Kubectl Utility
5. Create IAM Role for EKS Worker Nodes
6. Create Worker Nodes
7. Deploying Demo Application
Step 1. Create IAM role for EKS Cluster
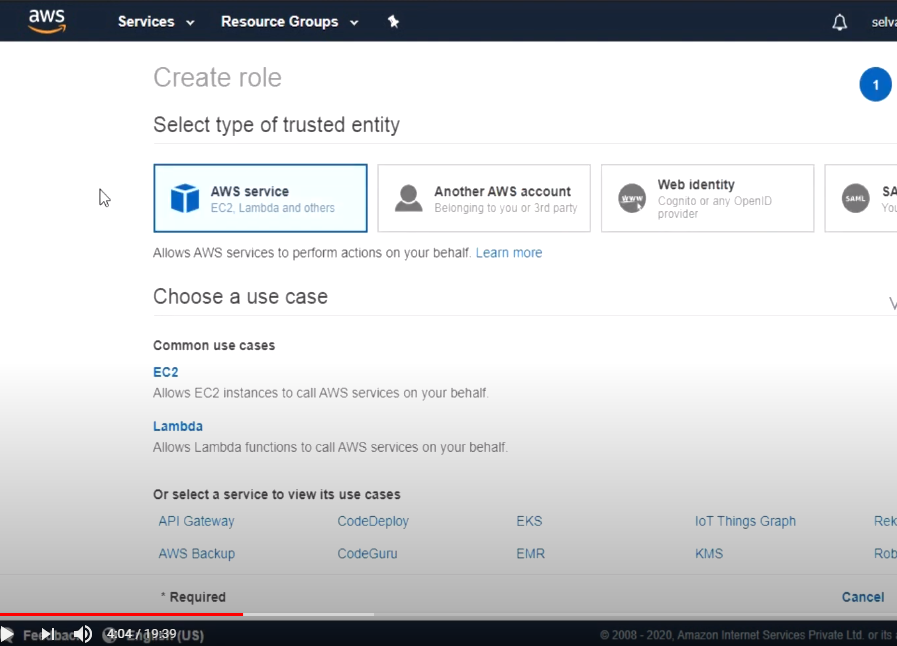
- IAM -> Role -> EKS -> EKS Cluster 선택
(EKS에서 관리하는 클러스터를 운영하는데 필요한 다른 AWS서비스 리소스에 대한 엑세스를 허용합니다.)

- AmazonEKSClusterPolicy 선택 -> 다음

- 역할 이름 : eksclusterrole

- EKS Cluster Role 생성 완료

2. Create Dedicated VPC for the EKS Cluster
- CloudFormation 으로 VPC 생성

- 문서참고 : docs.aws.amazon.com/eks/latest/userguide/create-public-private-vpc.html

- 스택이름 : eks-vpc-stack
- 파리미터
- VPC (192.168.0.0/16)
: PublicSubnet01 (192.168.0.0/18)
: PublicSubnet02 (192.168.64.0/18)
: PrivateSubnet01 (192.168.128.0/18)
: PrivateSubnet02 (192.168.192.0/18)

- eks-vpc-stack 최종 검토 -> 스택 생성 클릭

- 퍼블릭 서브넷 2개, 프라이빗 서브넷 2개, NAT IP 2개, NAT 게이트웨이 2개 생성

3. Create EKS Cluster
- EKS -> Cluster 생성

- EKS 클러스터 이름 : eks-cluster
- 쿠버네티스 버전 1.17
- 클러스터 서비스 역할 : eksclusterrole


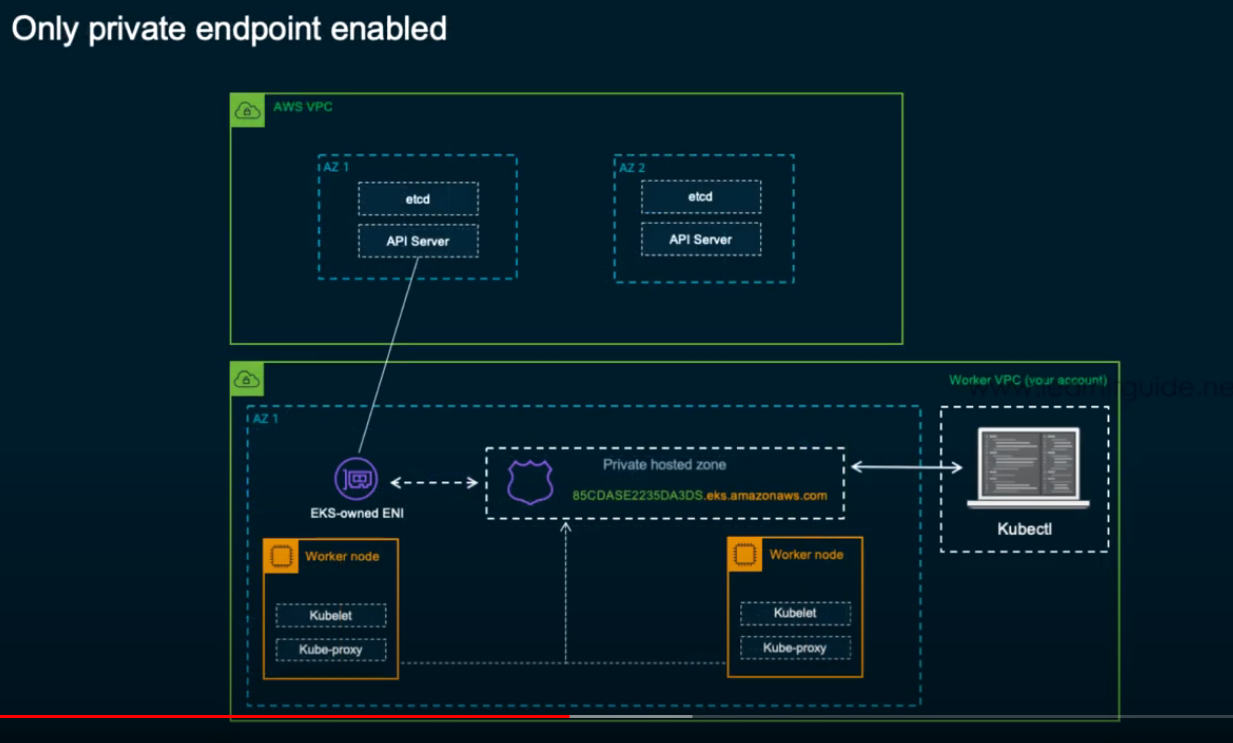
- Cluster endpoint access 확인

- Cluster endpoint access 확인
: 퍼블릭 및 프라이빗 선택

: Only public endpoint enabled

: Public + private endpoint enabled

: Only private endpoint enabled
- 로깅 구성 : 테스트로 API서버, 컨트롤러 로그 선택

- EKS 클러스터 검토 및 생성

- EKS 클러스터 생성 완료 (약 15분 소요)
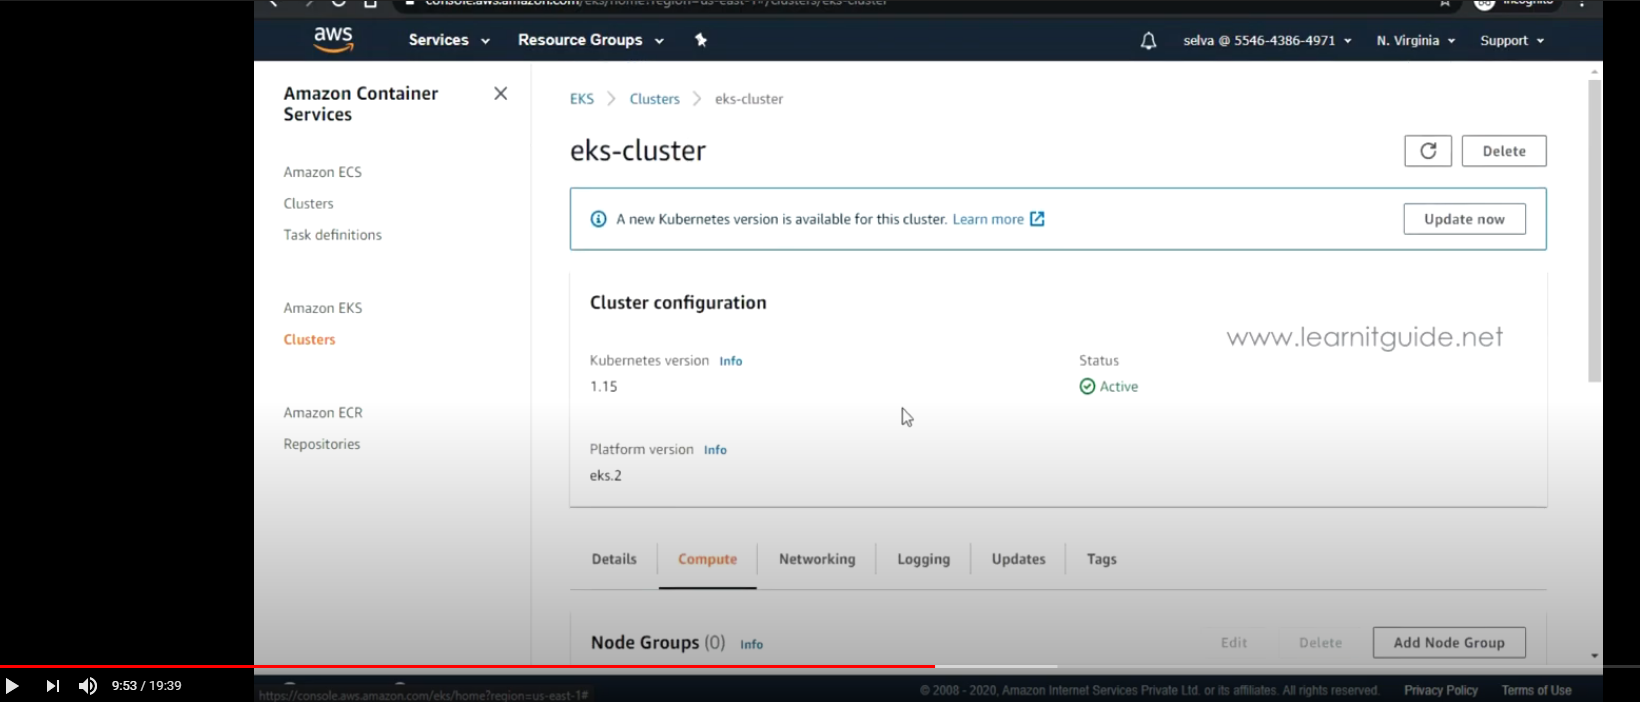
- API 서버 엔드포인트 확인

4. Install & Setup IAM Authenticator and Kubectl Utility
- aws iam list-users

- aws sts get-caller-identity

- install iam authenticator

- 문서참고 : docs.aws.amazon.com/eks/latest/userguide/install-aws-iam-authenticator.html
Installing aws-iam-authenticator - Amazon EKS
Installing aws-iam-authenticator Amazon EKS uses IAM to provide authentication to your Kubernetes cluster through the AWS IAM authenticator for Kubernetes. You can configure the stock kubectl client to work with Amazon EKS by installing the AWS IAM authent
docs.aws.amazon.com
- Installing aws-iam-authenticator
: curl -o aws-iam-authenticator https://amazon-eks.s3.us-west-2.amazonaws.com/1.17.9/2020-08-04/bin/linux/amd64/aws-iam-authenticator
: chmod +x ./aws-iam-authenticator
: mkdir -p $HOME/bin && cp ./aws-iam-authenticator $HOME/bin/aws-iam-authenticator && export PATH=$PATH:$HOME/bin
: aws-iam-authenticator help
- Installing kubectl
: curl -o kubectl https://amazon-eks.s3.us-west-2.amazonaws.com/1.17.9/2020-08-04/bin/linux/amd64/kubectl
: chmod +x ./kubectl
: mkdir -p $HOME/bin && cp ./kubectl $HOME/bin/kubectl && export PATH=$PATH:$HOME/bin
: kubectl version --short --client
: kubectl get svc
: aws eks --region ap-northeast-2 update-kubeconfig --name my-cluster
: more ~/.kube/config
: export KUBECONFIG=~/.kube/config
: kubectl get svc


- kubectl get ns
NAME STATUS AGE
default Active 135m
kube-node-lease Active 135m
kube-public Active 135m
kube-system Active 135m

5. Create IAM Role for EKS Worker Nodes
- IAM -> Role -> EC2 -> eks 조회
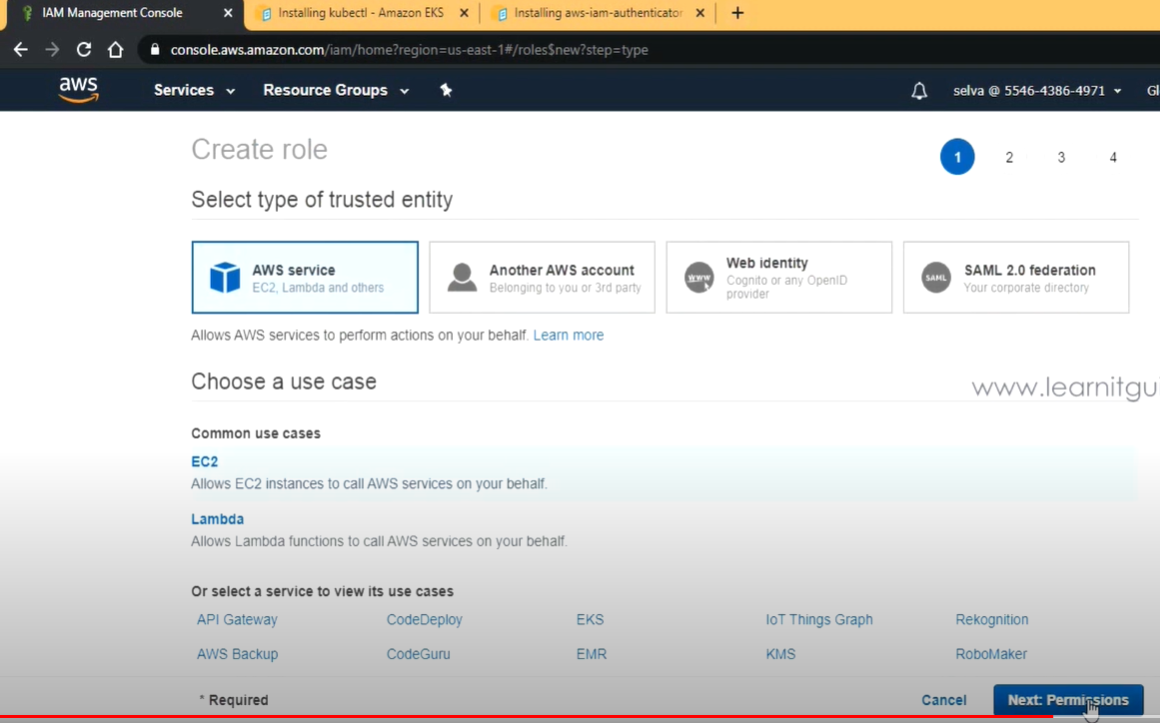
: AmazonEKS_CNI_Policy, AmazonEKSWorkerNodePolicy 선택

: AmazonEC2ContainerRegistryReadOnly 선택

- WorkerNode Role 이름 : eksworkernoderole
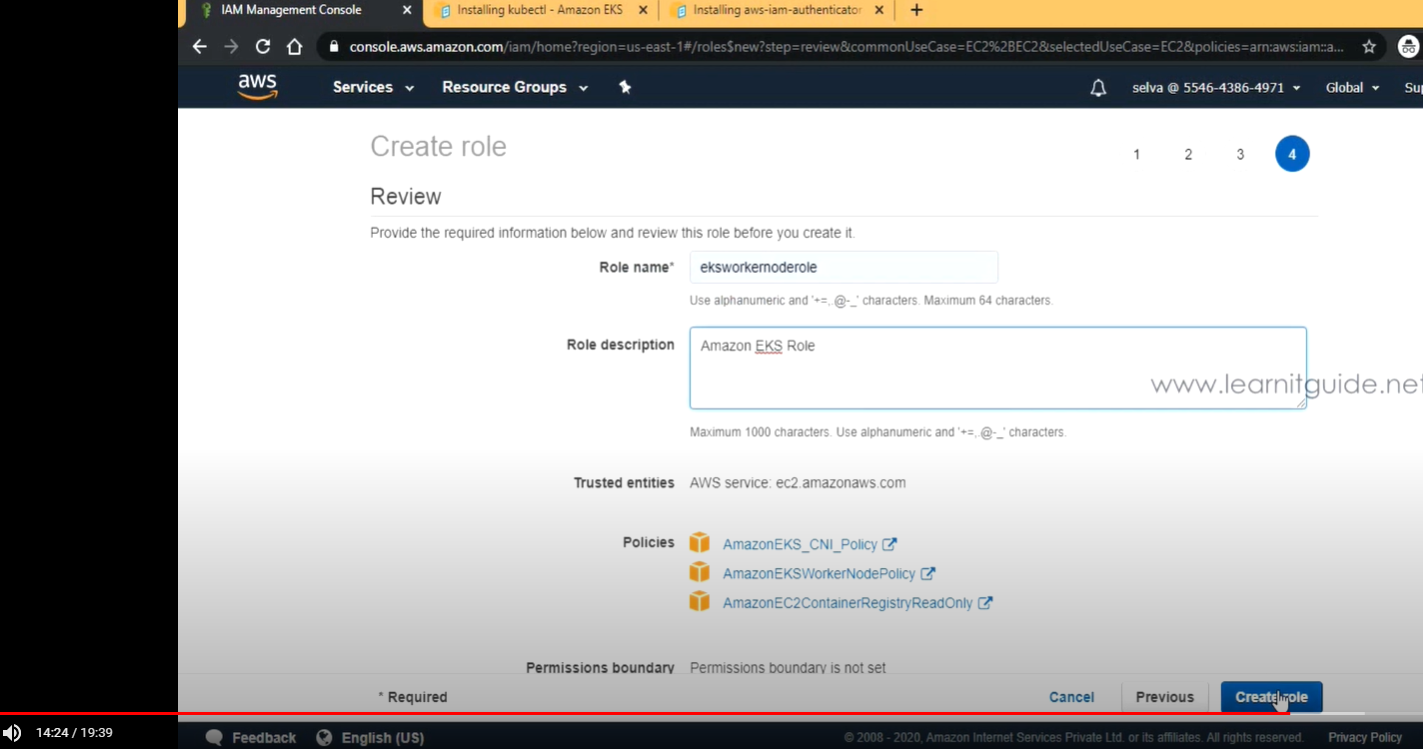
- eksworkernoderole 생성 완료

- WorkerNode 생성
: EKS Cluster -> Compute 선택

: WorkNode 그룹이름 - eks-worker-node-group
: IAM Role - eksworkernoderole 선택
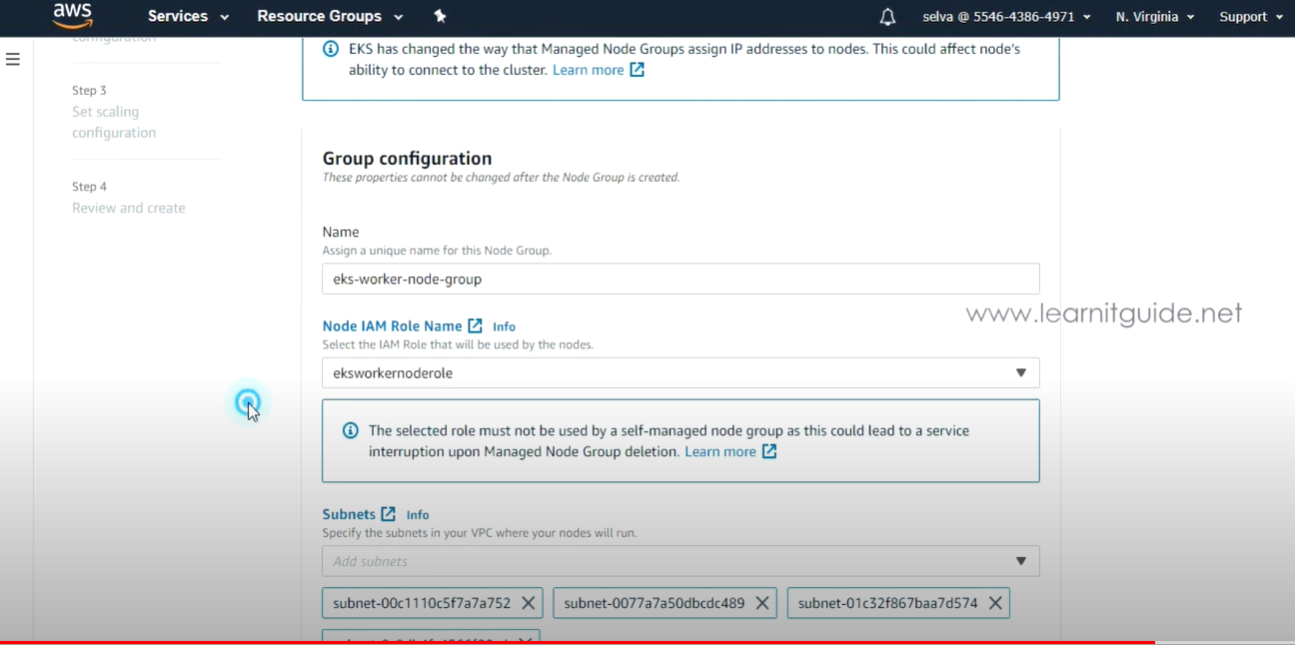
- Allow remote access to nodes : Yes
- SSH 키페어 선택
- 보안그룹 : 기본

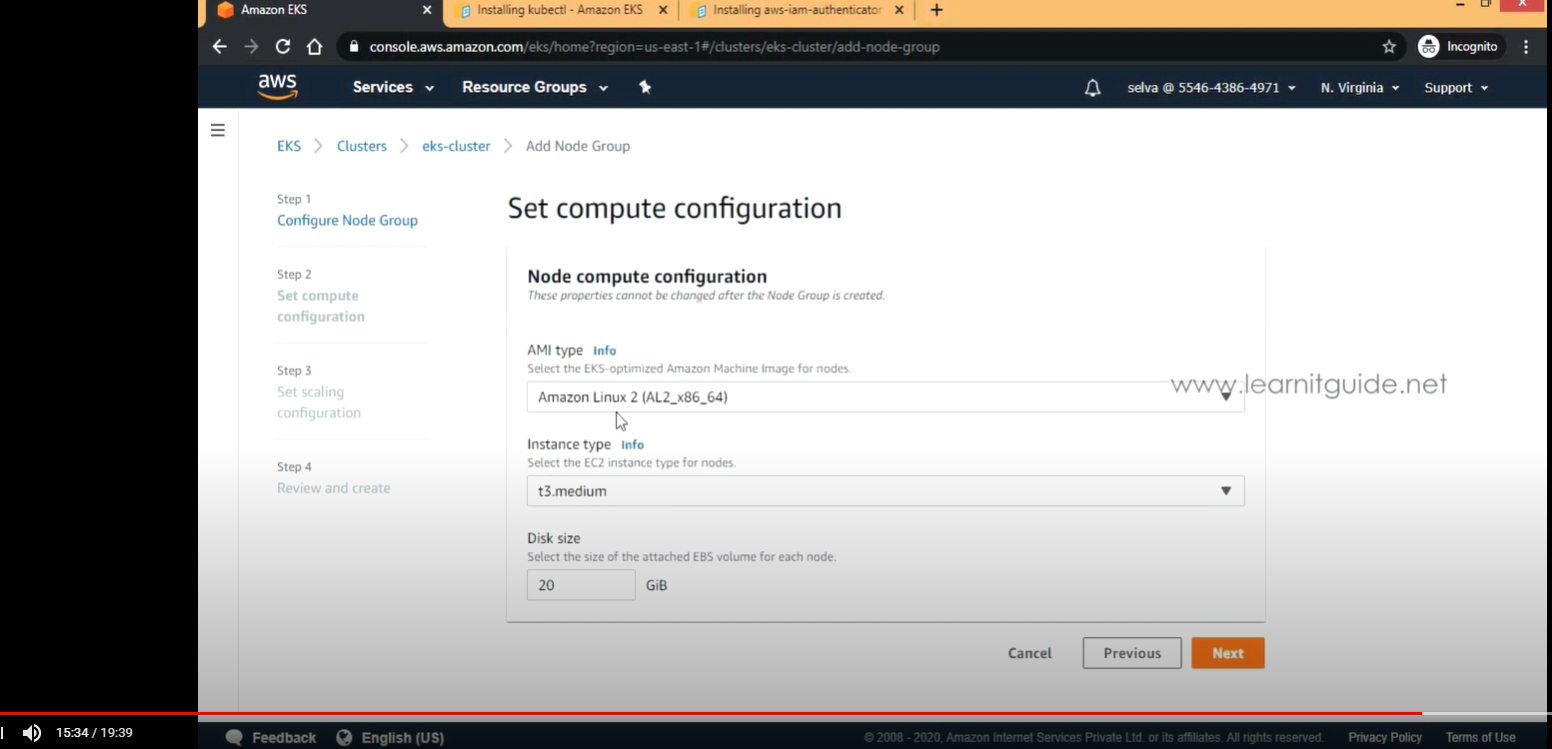

- Review and Create
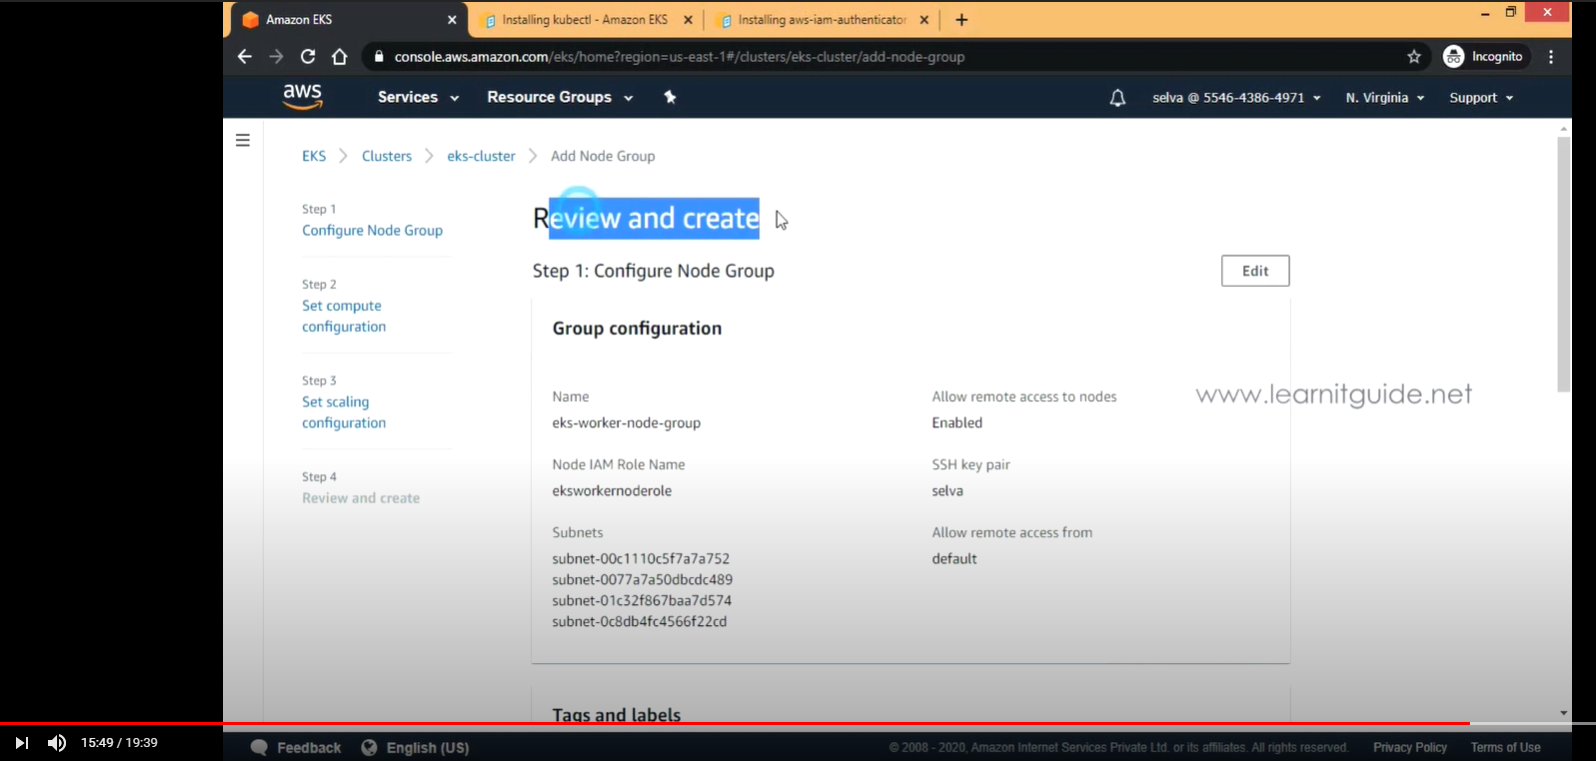
- eks-worker-node-group 생성 완료

- kubectl get nodes --watch

7. Deploying Demo Application
- kubectl get pods
: No resources found in default namespace.
- kubectl get deploy

- 테스트 파일 다운로드
: $ sudo yum install git
: $ git clone https://github.com/learnitguide/kubernetes-knote.git

- knote.yaml 파일 수정
: [ec2-user@ip-192-168-20-162 kubernetes-knote]$ vi knote.yaml
: replicas: 1 -> 2
: type: NodePort -> type: LoadBalancer

- mongo.yaml 파일 수정
: replicas: 1 -> 2
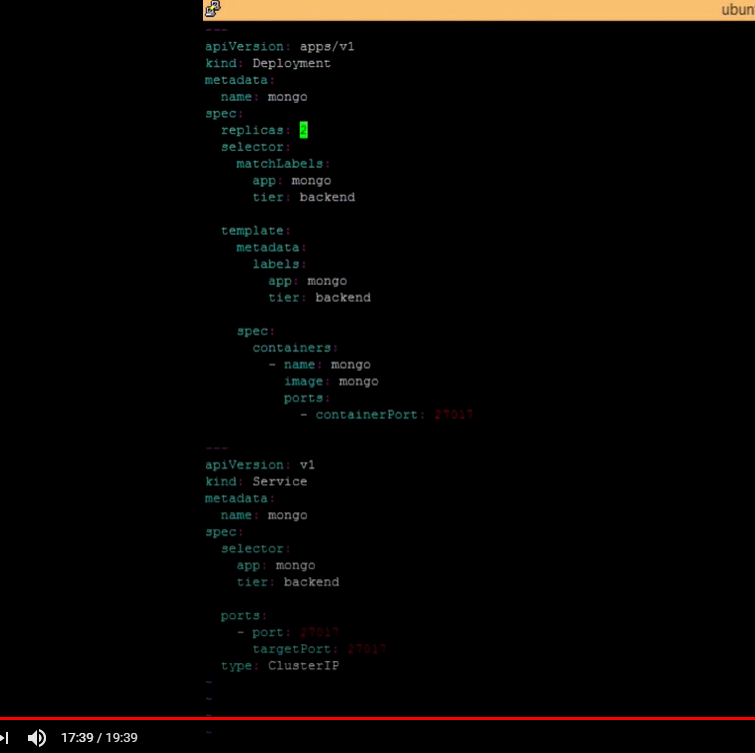
- kubectl apply -f mongo.yaml
- kubectl apply -f knote.yaml
- kubectl get svc


- kubectl get pods -o wide

- nslookup adc2c1b3043ea4ad4b919544f87cbd2e-1042958593.ap-northeast-2.elb.amazonaws.com

- curl adc2c1b3043ea4ad4b919544f87cbd2e-1042958593.ap-northeast-2.elb.amazonaws.com

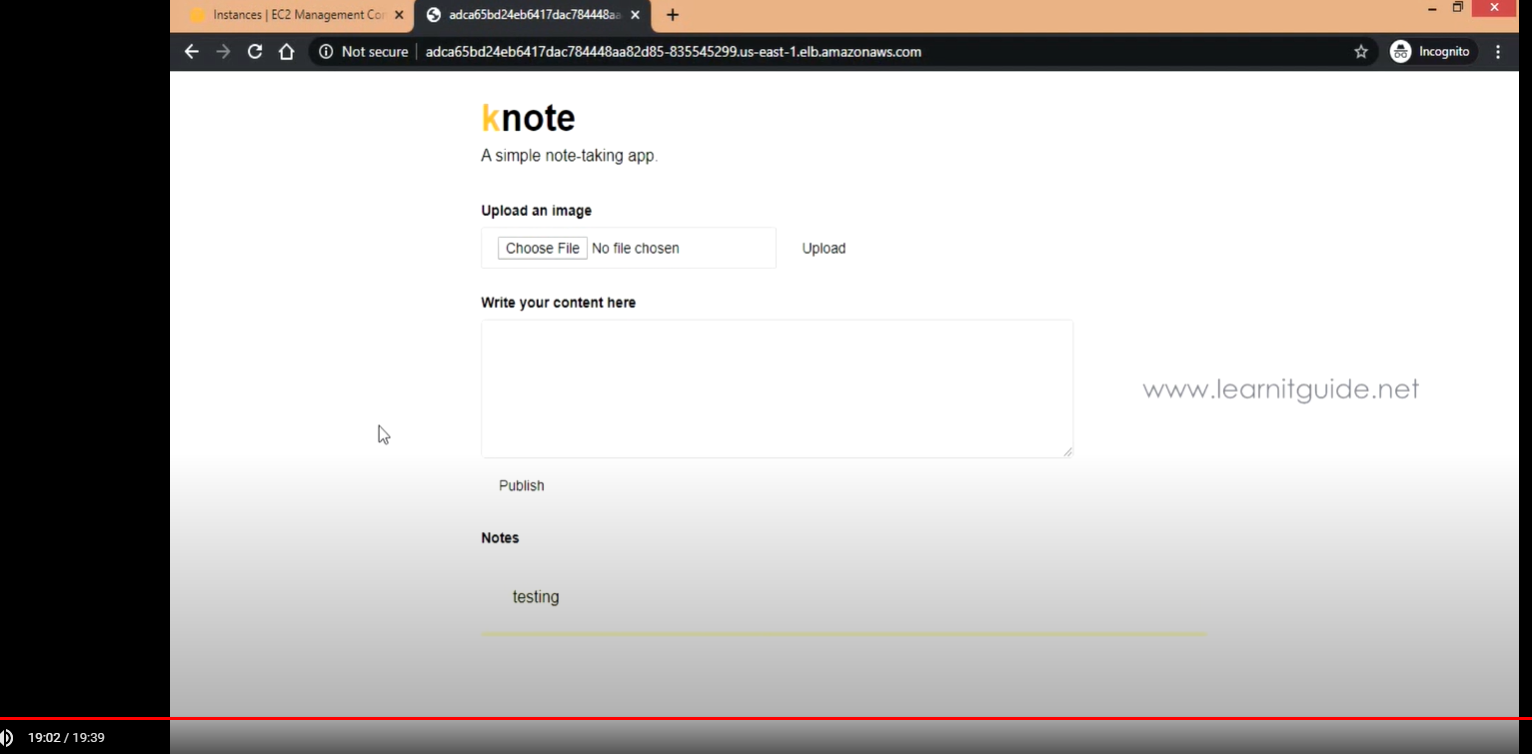
- Web 접속 테스트
--- knote.yaml ---
---
apiVersion: apps/v1
kind: Deployment
metadata:
name: knote
spec:
replicas: 1
selector:
matchLabels:
app: knote
tier: frontend
template:
metadata:
labels:
app: knote
tier: frontend
spec:
containers:
- name: app
image: learnitguide/knotejs:1.0
ports:
- containerPort: 3000
env:
- name: MONGO_URL
value: mongodb://mongo:27017/dev
---
apiVersion: v1
kind: Service
metadata:
name: knote
spec:
selector:
app: knote
tier: frontend
ports:
- port: 80
targetPort: 3000
nodePort: 30000
type: LoadBalancer
--- mongo.yaml ---
---
apiVersion: apps/v1
kind: Deployment
metadata:
name: mongo
spec:
replicas: 2
selector:
matchLabels:
app: mongo
tier: backend
template:
metadata:
labels:
app: mongo
tier: backend
spec:
containers:
- name: mongo
image: mongo
ports:
- containerPort: 27017
---
apiVersion: v1
kind: Service
metadata:
name: mongo
spec:
selector:
app: mongo
tier: backend
ports:
- port: 27017
targetPort: 27017
type: ClusterIP
'[AWS-SM]' 카테고리의 다른 글
| [참고] 14:Elastic File System(EFS) (0) | 2023.01.25 |
|---|---|
| AWS Network 기본 구성 구축 - 4 (ALB, ACM, Route53) (0) | 2023.01.25 |
| [참고] Access an AWS service using an interface VPC endpoint (0) | 2023.01.24 |
| [참고][AWS] 아예 인터넷 통신이 없는 VPC에 EKS를 구성하기 위한 VPC Endpoint (0) | 2023.01.24 |
| [참고] amazon-eks-vpc-public-private-subnets 템플릿 양식 (0) | 2023.01.24 |

